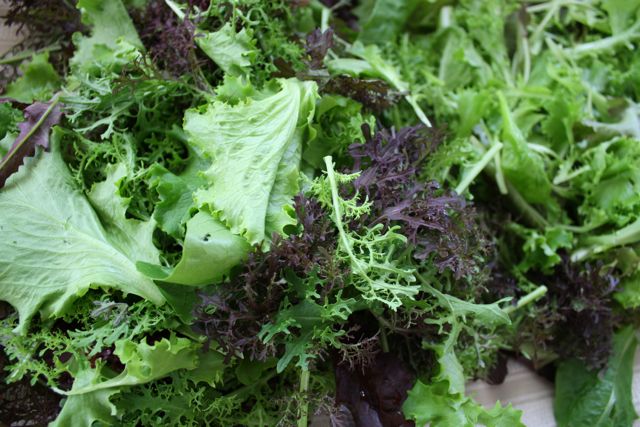
The salad of immortalitySince March we've harvested close to 20 lbs of our lettuce mix. Normally we don't like to toot our horns BUT we've gotten so many people addicted to our lettuces that we have to admit, they are the best tasting lettuces out there. No longer is lettuce a background to something else, these babies stand on their own: bold and spicy, extra healthful because of the addition of baby mustards, you wouldn't ever want to dilute them with anything else like a strong dressing. They stand on their own. Some of the comments we've received:
"the greens were OUTRAGEOUS!! Just the color alone was a treat. Makes all other lettuce seem like watery nothingness.... Thank you!" - Anne H
"Wow- just finished the last of my greens- they were amazing, and I'm wanting more! Thank you so much for producing such amazing produce!" - Lauren B
"Your lettuce mix made for the most intensely flavorful, sprightly salad--peppery and delicious, with some heat. We had monkfish from the market, too, so it was my idea of a perfect meal. Our thanks to the growers". Barbara B
Many vegetarians have commented that it's the best lettuce they've ever had and more than a few have said after leaving it in the fridge for 2 weeks, it tasted like it was just harvested. They couldn't believe it. So, yeah, we're tooting our horns rightfully so. One of the interesting things we've learned about growing lettuce is that it's harder than you think. It takes a while from germination to the point where they can be transplanted. For us, this works better than direct seeding. But once established they can be cut again and again. After doing 6 Farmers' Markets this season selling our seedlings, more than a few people asked for lettuce transplants. We don't sell these because their prime time is cooler weather: spring and fall.
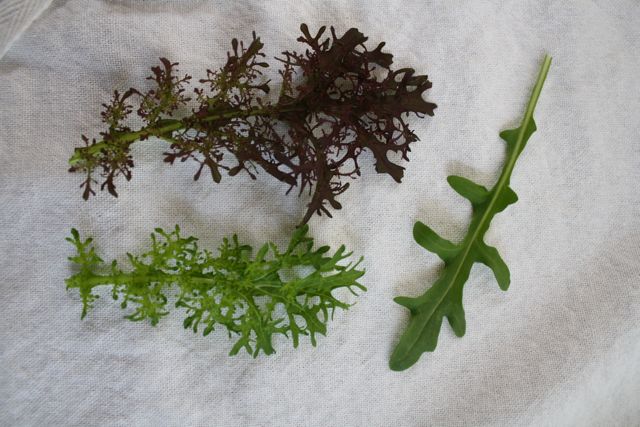
Secret bold ingredients: Sylvetta Arugula and Golden and Purple Frills baby mustaIt seems so counterintuitive. Most people eat salads in the heat of the summer; a time where lettuce can bolt or go bitter. When you tell them when they are best grown, most people are very surprised.
This summer we'll experiment more with some varieties like Thai lettuce that can withstand some heat. We'll likely plant them under things that can provide shade or utilitze the lower light areas of the growing area. We'll let you know how it goes...
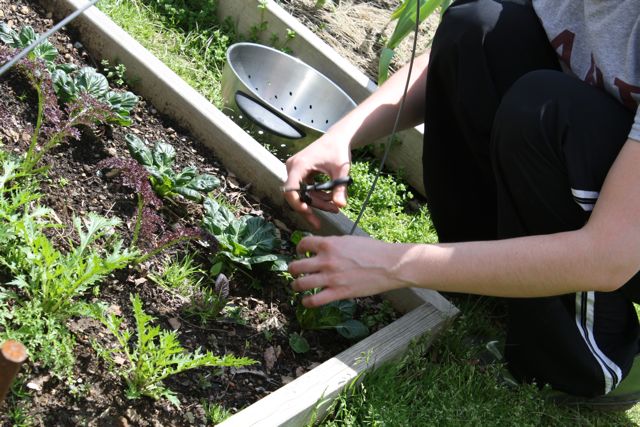
Everything is hand harvested. Pippa harvesting tatsoi.
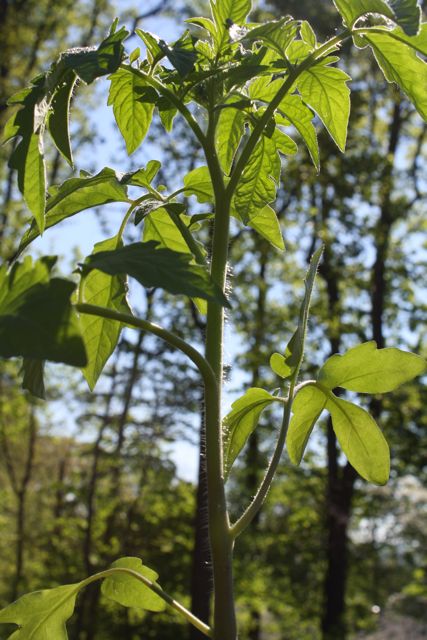
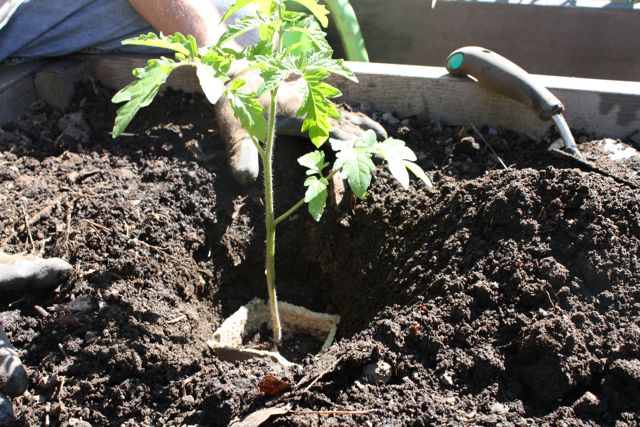
Note all the "hairs" on the tomato stemWe kicked off last weekend with our first sale at the Palisades Farmer's Market and this week starts the first time we'll be at the Nyack Farmer's market. It was a wonderful turnout and, as usual, the perks of having a stand is that we meet so many new people in the community as well as seeing familiar faces and friends. As always, our tomatoes are the most popular selling seedling. Well, our seedlings are really plants when you see how big and healthy they are. We often get questions on the best way of growing them.
ROOTS
One of the reasons we plant our plants in Cowpots (made of cow manure from Connecticut dairy farmers) is that it's not only sustainable, but it allows for minimal root disturbance when transplanting - usually an added form of stress for the plant. It's worth the extra expense. Other "biodegradable pots" made of peat or coir, in our experience do not break down easily and you'll often find that they are somewhat still intact when you pull that plant out of the ground in the fall. Not a good sign. Cowpots, as long as you water them heavily at the start, will easily break down and simultaneously give your plant a boost of nitrogen for growing from the manure. Neat huh!
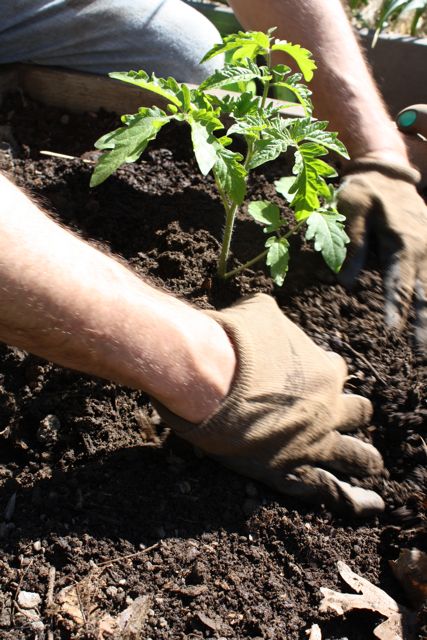
The other thing to realize about tomatoes is that you want a plant that has an extensive network of roots. The more roots the better and stronger your plant because a) the plant will have better drought tolerance and b) better access to soil nutrients. This concept applies to all things that you grow. What is especially interesting about the tomato are all the "hairs" that you see on the stem. These have the potential to become roots so the deeper you plant and cover those hairs with soil the more roots will establish. Neat, huh!
We suggest removing the bottom 2 tiers of branches and leaves and plant to the hilt of the next level. If your soil is not optimal when you dig down deep i.e. you hit sub soil which is clay-like or sandy, your other option is to plant the tomato sideways. Initially the plant appears to be sideways and tilted on the ground but no worries, they plant will go towards the sun and straighten up.
WATERING
Tomatoes like water and as mentioned, if you are planting in Cowpots, water heavily the first week to start the breakdown process. Avoid watering directly on the leaves if possible. This helps prevent diseases like blight splashing up onto the leaves and prevents leaf sunburn. One thing we do recommend is not just watering the small area around your newly planted tomato, but the entire bed around the plant. If you just provide water to a small localized area around the plant, the roots (yes, it comes back to the roots) have no incentive to grow longer since all the water is in close proximity. So even though it feels like you're watering bare soil, you are indeed providing water for that nearby tomato and encouraging its roots to grow long and seek out nutrients and minerals further away from its location.
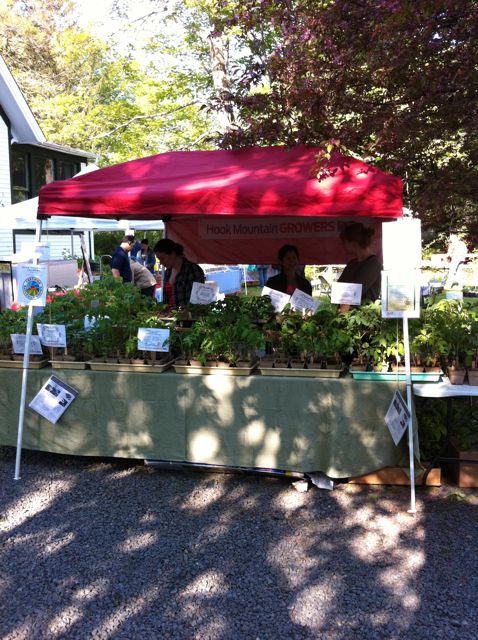
We'll be at the Nyack Farmers Market Thursdays on May 12th, 19th and 26th from 8AM - 2PM and again at the cozy and comfortable Palisades Farmers Market Saturdays on May 14th, 21st and 28th from 9AM - 1PM. We have 27 varieties of tomatoes but much much more! Heirloom, unusual and hard to find seedlings are what we love growing. Everything is organically grown and have been amended with nutrient dense growing techniques for the healthiest plants in the universe. Come visit us this month!
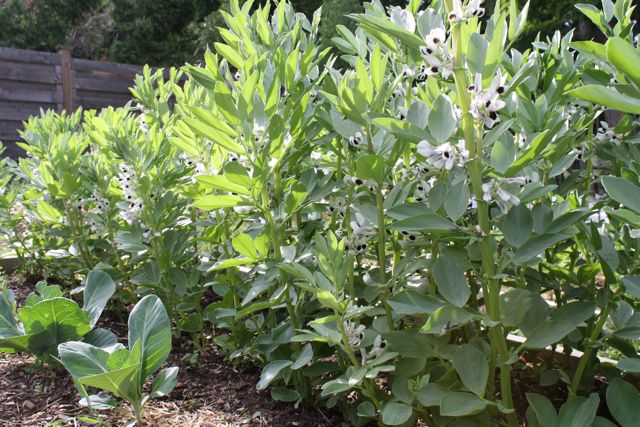
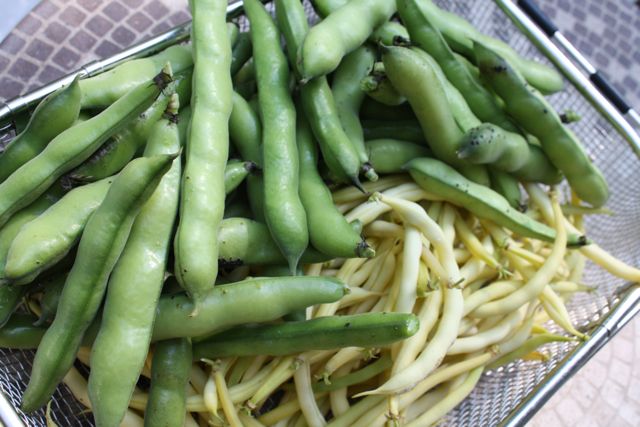
Last year's harvest of fava and yellow wax beansFava Beans, or broad beans as they are known in the UK, are the ubiquitous spring crop at farmer's markets. Actually, they really show up in late May or June. Here, at HMG, they are just being planted. As a crop, they don't yield much when you take into account their spacing and the final weight before it makes it into your mouth. Somewhat labor intensive, you have to remove both the thick pods and also the skins of the larger beans. So a pound of beans gives you about a cup to a cup and a half of usable product. It is worth it? Yes! The taste, in my opinion, is sublime. One of my favorite things to make is a fava bean and mint puree or just lightly steamed favas sauteed in a little butter with a light grating of parmesan cheese. Of medicinal interest, favas may be helpful for those with Parkinson's disease as the bean, leaves and roots contain naturally occuring levo-dopamine, the medicine that is used to treat Parkinson's disease. Also, individuals with G6PD deficiency (usually of Mediterranean descent) will develop a hemolytic anemia (lysis of red blood cells) if favas are consumed.
GROWING. Direct seeding vs Sprouting
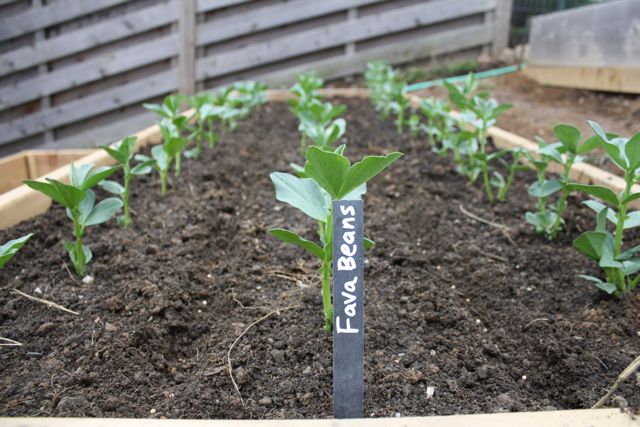
Planting these are easy. You can directly seed these whopper-sized seeds and they germinate quickly. I started them in 2" soil blocks weeks ago in hopes of getting an earlier crop. They do root vigorously in soil blocks so don't wait too long to plant them out. They are sown 6-8" apart in rows 18-36" apart. Being greedy for space, I decided this year to be more bio-intensive about the planting and used John Jeavon's guide to every 8" with smaller rows. As they grow, there are a few issues to look out for. The stems will need a light support, whether it be small bamboo stakes or creating a nest of twigs around the plants and rows. Watch out for the black bean aphid or blackfly. You can reduce the problem by pinching out the top 4" when the plant is in full flower and your first bean is forming at the base. Don't throw these away; they can be lightly cooked and thrown into a pasta dish. This is "nose-to-tail" growing!
Pre-sprouted favas planted and cilantro directly seeded in between.
COMPANION PLANTING AND NURSE CROPPING
Companion planting is a method of plant grouping so that each plant benefits from the proximity of the other. Supposedly tomatoes are helped by basil and strawberries by borage, for example. Conversely, there are things that should not be planted together, most notably fennel. Supposedly nothing grows well when planted next to fennel. From what I can tell, much of this is anecdotal through the collective decades of growing and observations people have made. It would be interesting to see some science behind this. It is rumoured that fava's enjoy the company of the herb savory and eggplant. However, it is many weeks before I put eggplant in the ground and savory is nicely situated in the perennial herb area. So I'm going to take a gamble and plant cilantro in between. I am sick and tired of purchasing cilantro only to see it quickly go brown in the fridge days later. It is an herb I use all the time and finding areas that I can succession grow these is sparse in a bio-intensive mini-farm. This will be an experiment and I'll be sure to report back.
Last year, I planted cabbage as a companion plant to favas.
Nurse cropping is another version of companion planting where by you can quickly grow a crop in an unused area next to another crop that has a longer growing cycle. I do this with broccoli and lettuce. By the time broccoli gets large enough, the lettuce below will benefit from the shading of the large waxy leaves. This extends the growing season of lettuce and prevents bolting. It's just another way of space efficiency and symbiosis. Fava beans can be a nurse crop for potatoes. As a legume, they'll fix nitrogen into the soil for the enlarging and hungry potato crop and they will be conveniently harvested well before the potato leaves take over in growth. We'll also try this method for the first time this year and see what happens!
Hungry for a recipe? Check out our friends at Grapes and Greens. Deborah Soffel created this recipe of Artichoke Hearts, Spinach and Fava Beans Braised in White Winethat I hope to try once fava beans are ready in our farm. Or maybe Hannibal Lecter's favorite: liver, fava beans and a nice chianti...
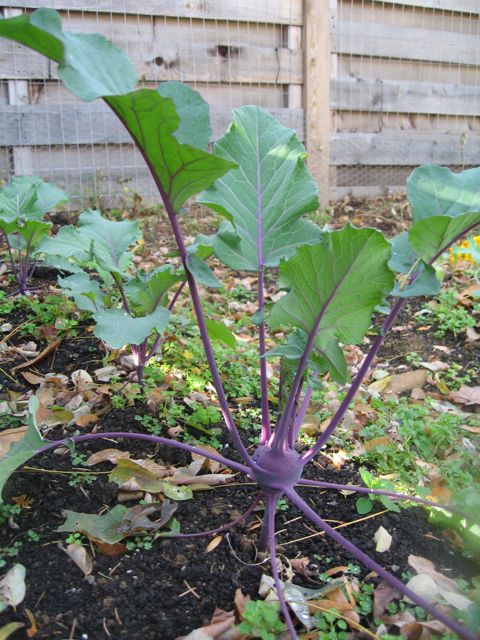
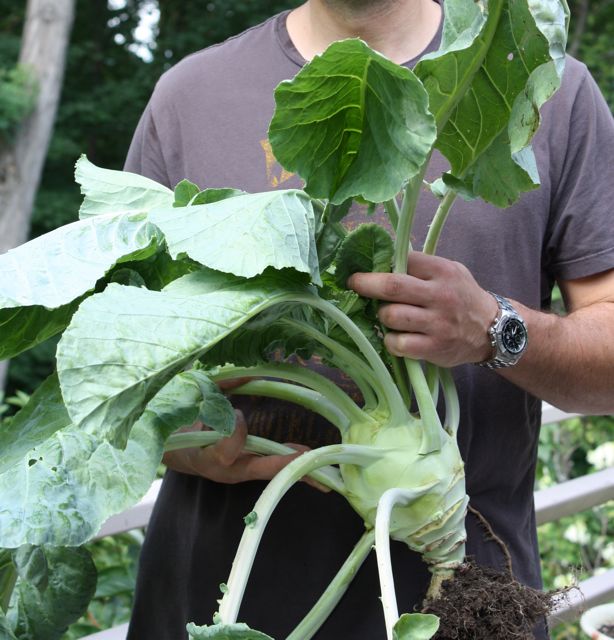
A few weeks ago I gave a lecture to some physicians and acupuncturists about the integration of food and farming in medicine. My first slides were pictures of certain vegetables in their entirety (roots, stems and leaves) and I started the talk with a game: Let’s identify that vegetable! The first was this series of pictures:
No one was able to identify this as kohlrabi. An under appreciated vegetable here in this country, it is usually sold as a round light green bulb. Rarely do people see the growing form which looks not dissimilar to a UFO. I fell in love with this shade-tolerating vegetable after I made my first meal of kohlrabi pancakes with minted yogurt.
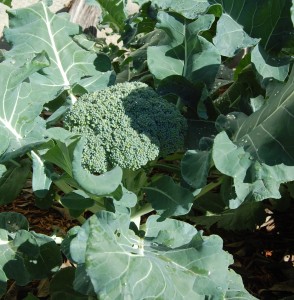
The second vegetable in the game:
More easily identifiable, but with a little hesitation. Everyone knows what broccoli looks like, of course, but I was stunned this summer when my brother stood at the end of a raised bed filled with broccoli and could not identify the vegetable - it was in its growing form that confused him. The head which we eat is surrounded by multiple big waxy leaves and that’s what threw him off.
My whole point with the above lessons was that we have become so dissociated with what we eat. Such that it is to the point that items like plastic-wrapped yams are conveniently pre-wrapped so they can be easily be put in the microwave and further separate the consumer from the actual vegetable. Another disheartening example is a packaged steak which appears as nothing more than a soft red wet mass of muscle; no thought is paid that it came from anything resembling an animal and even less thought to how it was raised, fed and slaughtered.
I then showed a video of a new product called “Fruit 2 Day” a fruit containing beverage the advertiser touted as a “new way to eat fruit”. The video begins with a young girl looking disgusted at a bunch of moldy strawberries she finds in her fridge.
The piece de resistance was in the subtle last statement of the commercial: “find it in the produce section.” Our perceptions of what is healthy, fresh and what is REAL food is persistently and indolently being manipulated by media and advertising. Sadly, most of us don’t know what real food is anymore and when we’re given it, we’re not sure what to do with it. Case in point: Kale.
One physician told me that she disliked getting so much kale in her CSA basket. How many times can you blanch and saute it with garlic and onions? Not only was it a non-versatile vegetable for her, she couldn’t get her husband to eat it and forget about even presenting it to the kids. I challenged that assumption and could because I was once in her shoes standing there among the abundant kale in my farm not sure how to make it interesting enough to serve it with any frequency. But I persevered, scouring through cookbooks, recipe websites and pinning down every vegetarian I knew, asking them - “what is your favorite thing to do with kale?” Now I am a kale convert and the last recipe I made with kale and quinoa was so simple and the kale so sweet from the frost that my better half emphatically jumped up declaring his new found love of kale. No, not anything like Tom Cruise on Oprah’s couch, but hey, for a carnivore loving man to express delight over one of the most healthiest things you could possible eat, that made all my kale research and experimentation worthwhile. Now he can proudly wear his “Eat More Kale” T-shirt with newfound pride. He looks hot in it as well.
There are advantages to living in colder climates (not many for every type of food grower, I admit) and that is frost’s effects on certain vegetables, not to mention forcing us to experiment with growing cold tolerant vegetables we might otherwise avoid. Certain things get sweeter when exposed to frost: carrots, turnips, parsnips, brussels sprouts and kale. In an effort to survive the colder temperatures, the plant begins to convert its starches to sugars because sugar has a lower freezing point. Carrots become like candy and kale becomes king. That’s one thing California and Florida can’t top!
So you’re still waiting for those kale recipes, I know. Some of my favorites are the above-mentioned “One Pot Kale and Quinoa Pilaf” on my new favorite foodie blog Food 52. Trust me, you can force down a lot of kale this way and people won’t even know it. Then there’s the now ubiquitous kale chips with its infinite variations. I give credit to the first person who fed these to me, Dan Barber, in this recipe. Kids won’t know the difference between their other starchy crunchies and these healthy bad boys. My nephew Max, pickiest eater in the universe, can attest to that. After Thanksgiving, using the turkey carcass, I made Alice Water’s Turkey Soup with Kale (and doubled the amount of kale). Kale can be thrown in with many other brothy soups as well to give it a balancing vegetable component. But the most interesting recent recipe was recently published by the New York Times: Grilled Coconut Kale by Vij’s in Vancouver, British Columbia - one of the best Indian food meals I’ve ever had. I served it along side curried chickpeas and basmati rice. Heavenly.
My hopes to you for the holiday season: find a way to get this important vegetable on your table and enjoy the way nature has changed it for you, just in time when most of our produce is no longer locally grown, so you can continue fresh local greens throughout the chill and support our local food movement.
RECIPE: GRILLED COCONUT KALE
3 bunches kale 3 cans coconut milk 1 Tbs kosher salt 1 tsp cayenne 1 tsp mild paprika 1/2 cup freshly squeezed lemon juice
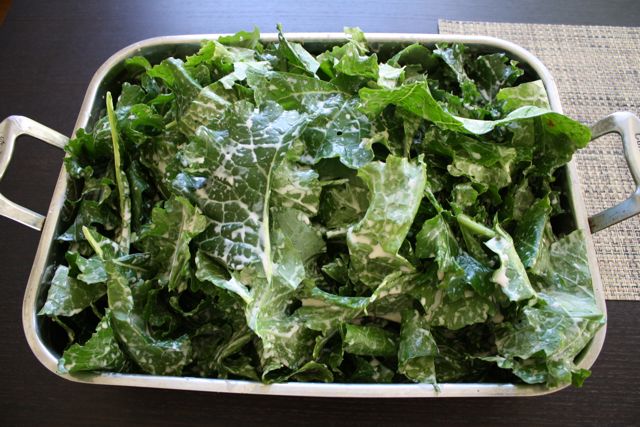
1. Wash the kale thoroughly and cut out the stalks. Cut the wide leaves into strips the width of the small leaves. 2. In a large pot set over a low flame, heat the coconut milk until it is thoroughly mixed and just lukewarm. Transfer to a large, nonreactive bowl and add the remaining ingredients. Stir in the kale, cover with plastic wrap and refrigerate for at least 4 hours.
I used a large roasting pan to accommodate all the kale
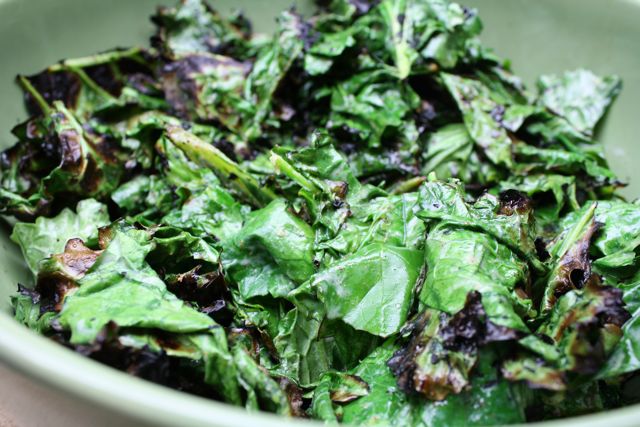
3. Preheat a grill or a cast-iron grill pan over high heat. Remove the kale from the refrigerator and stir to make sure the leaves are well covered in marinade. Using metal tongs, place the kale on the grill in a single layer. Cook for 45 to 60 seconds, or until the leaves are sizzling, then turn over and grill the other side for another 45 to 60 seconds, or until the leaves have visibly softened. Serve immediately. Serves 6. Adapted from Vij’s Restaurant, Vancouver, British Columbia.
The slightly burned edges made the dish
Cheers to the one thing we can’t live without: Good Health
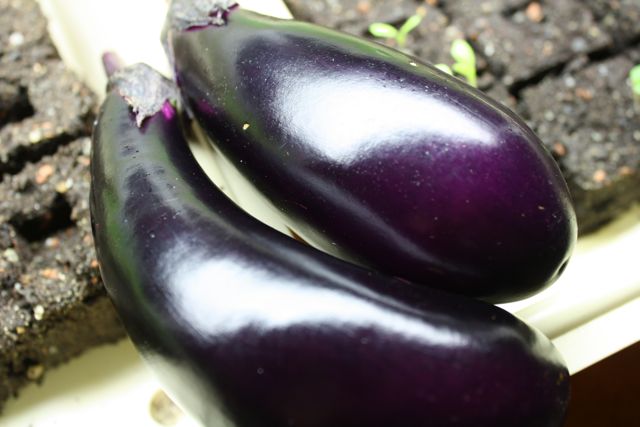
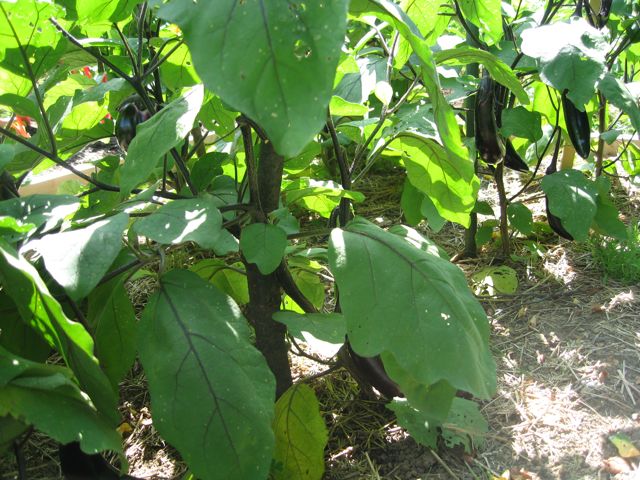
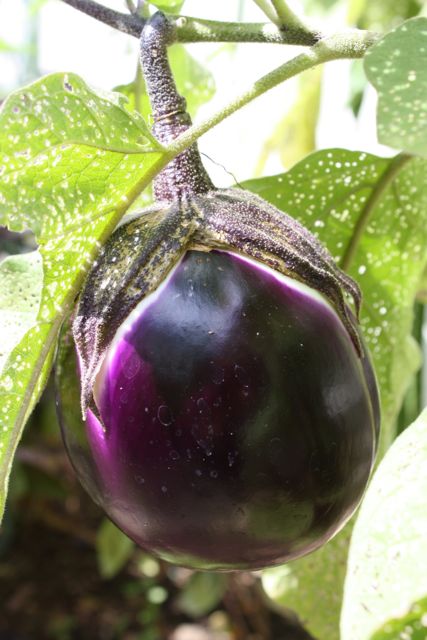
It’s Fall. For most people who grow, this is the last stretch for the heat-loving plants such as tomatoes, peppers and eggplant. At this point, I think I’ve eaten enough fresh tomatoes to last me through the winter. One thing I haven’t grown tired of are eggplants. I never thought too much of them until I grew them and was forced to find creative ways to cook them; now I’m an addict. We grew a few different eggplants here but my favorites are a Japanese and Tuscan variety. The Japanese come in early and continue to produce and the Tuscan Globe comes in later in the summer and are prolific with heavy, strikingly violaceous fruits.
The biggest issue in growing eggplants are keeping flea beetles from making swiss cheese from the leaves. This annoying poppy seed-sized pest shows up early in the season and continues to eat away the leaves of the eggplant. I am surprised that eggplant is not considered one of the “dirty dozen” fruits - the vegetables that contain the highest levels of pesticides even after being washed and peeled. The list, compiled by the Environmental Working Group (EWG), lists celery, kale, and bell peppers as among the most contaminated. Obviously, with organic growing techniques this is not an issue.
Part of our organic practices to reduce pests and disease is to use Nutrient Density growing techniques that address the quality and health of the soil which will then translate to a healthier plant. The same reason a strong healthy immune system is integral to a healthy human being, the same logic applies for the plant. Last year our eggplants had flea beetles but the plants were so strong that they could still grow lush and produce a nice bounty of fruit in spite of the bugs. This year, the flea beetles became more of a nuisance and the plants were not able to compete with them. They did not succumb to the bugs but they were certainly not the optimum and productive plants we saw last year. Click HERE to see an example of plant stress and evidence of how a strong plant is your best defense against disease and pests. Please note how the plants at the left of the bed received optimal light and are healthy and pest free and how the plants towards the right were partially shaded and have evidence of insect damage to the leaf. The Nutrient Density growing method can take 3-4 years to really change the mineral and microbial content of the soil so we didn’t expect to see a dramatic change right away. Every season, we re-test soil and re-amend the soil and much of the amendments take seasons to break down to be utilized by plants and soil microbes. So what did we do besides watch the flea beetles have a hey day?
CONTROLLING FLEA BEETLES - ORGANICALLY
In the long term, addressing the soil health should obviate the need for “control” but in the meantime, I’m not going to sit around letting a little army of flea beetles dine on my eggplant.
1. Crop rotation. This is essential since the adults can overwinter in the soil and in plant debris. However, if your area is small, you are likely not able to plant them far enough from last season’s planting area. They emerge in the spring waiting for you to put your healthy seedlings in the ground. If your seedlings are stressed they will take this opportunity to defoliate and kill your plant. You definitely want the healthiest seedling possible and you don’t want to plant these seedlings too early since eggplants LOVE heat. Using a row-cover in the spring until the population of flea beetles die down is also helpful. It’s just a physical barrier between the plant and the environment.
2. Trap Crops - this is more applicable to farms, but the idea is to plant a more desirable plant for the flea beetles to feed on so they leave the eggplant alone. This includes planting Chinese mustard greens nearby or to interplant radishes like “Chinese daikon” or “Snow Belle.”
3. Manual Removal - There are reports that physically removing beetles can be effective. The flea beetle is so small that some people report using a small portable vacuum to literally just suck them off the plants. We have not tried it but plan on doing it next year if continues to be a problem. Time to find the old Dust Buster.
4. Botanical controls - the last option. The only one that we would advise using is a very diluted spray of organic neem oil Apply this only on a cloudy day.
Tuscan "Prosperosa" Eggplant. Note the leaves.
COOKING WITH EGGPLANT
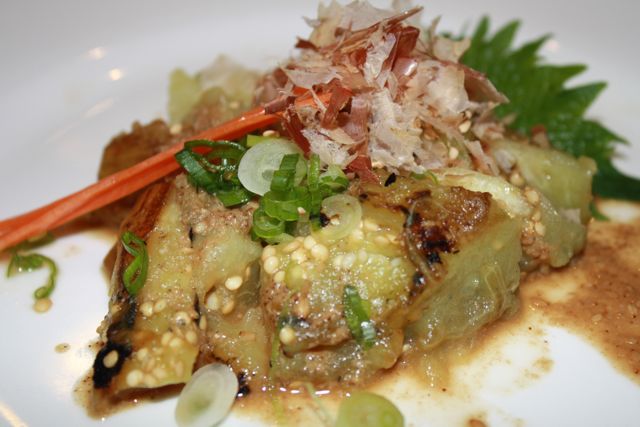
A few of our favorites dishes that use eggplant include a Baba Ganoush, Roasted Vietnamese Eggplant with Scallion Oil, breading and frying the slices of eggplant, grilling slices, and using them in stir-fry dishes. When laziness creeps in, we bring our Japanese eggplant to our local sushi master, Ume, at Murasaki in Nyack, New York. The first time we did this, Ume looked at the eggplant thoughtfully, brought them back to the kitchen to broil and minutes later presented us with a simple dish from his childhood in Japan. How cool is that? Here’s the recipe he used. It’s simple and sublime. It is so refreshing to find a chef that is so excited by the challenge of using local ingredients on the spot. Murasaki has become one of our favorite restaurants in town and we high recommend it to anyone who enjoys traditional artisanal sushi.
RECIPE: Yaki Nasu (Ume’s Eggplant)
4 Japanese Eggplant 3 Tbs sesame paste 1 Tbs soy sauce 1 Tbs brown sugar 2 Tbs Dashi (this is a bonito and seaweed broth). You can substitute with dashi powder which is sold in Asian markets. garnish with 2 Tbs bonito flakes and/or thinly sliced scallions (optional)
Broil eggplant until soft (5-10 minutes). Peel off skin and cut into sections Blend the remaining ingredients together Spoon sauce over eggplant and garnish with bonito flakes and scallions



 Sunday, May 22, 2011 at 5:20PM
 The salad of immortalitySince March we've harvested close to 20 lbs of our lettuce mix. Normally we don't like to toot our horns BUT we've gotten so many people addicted to our lettuces that we have to admit, they are the best tasting lettuces out there. No longer is lettuce a background to something else, these babies stand on their own: bold and spicy, extra healthful because of the addition of baby mustards, you wouldn't ever want to dilute them with anything else like a strong dressing. They stand on their own. Some of the comments we've received:
 Secret bold ingredients: Sylvetta Arugula and Golden and Purple Frills baby mustaIt seems so counterintuitive. Most people eat salads in the heat of the summer; a time where lettuce can bolt or go bitter. When you tell them when they are best grown, most people are very surprised.
 Everything is hand harvested. Pippa harvesting tatsoi.
 guide to every 8" with smaller rows. As they grow, there are a few issues to look out for. The stems will need a light support, whether it be small bamboo stakes or creating a nest of twigs around the plants and rows. Watch out for the black bean aphid or blackfly. You can reduce the problem by pinching out the top 4" when the plant is in full flower and your first bean is forming at the base. Don't throw these away; they can be lightly cooked and thrown into a pasta dish. This is "nose-to-tail" growing!